It feels important when you first notice that your eyebrows are getting thinner. You might see it in the bathroom mirror when the light is harsh in the morning or in a selfie where your eyes look less defined than they did before. The ends look sparse, and from some angles, the arch disappears. No amount of pencil seems to help. That’s when you start to think about getting a brow lamination at a salon like everyone else does. But then you think about making the appointment, paying for it, going there, and smelling the chemicals. You close the browser, wash your face, and think there must be a better way.
The Quiet Magic of Brows You Make Your Own
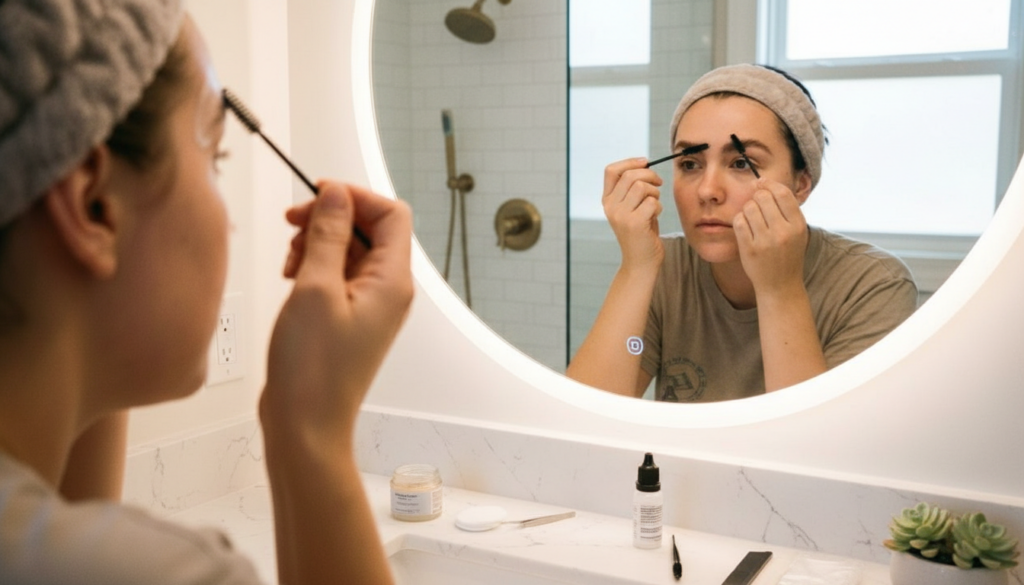
It’s very satisfying to sit at your bathroom counter late at night with the fan humming and your favourite playlist playing softly in the background while you realise that you can change the way your brows look with just a few careful steps and some time. No bright lights in the salon. No small talk. You and a mirror and a small brush. Home brow lamination sounds more complicated than it really is. The main idea is to gently move your existing brow hairs in the direction you want them to go for a long time so they look fuller and more defined. You are not changing the shape of your brows. You are just helping your natural brows look their best. The most important thing is to get rid of the fear factor. People often use salon terms like “solutions,” “activators,” and “neutralisers” to talk about lamination techniques. But at home, they are just a few simple steps: soften the hair, shape it, set it in place, and feed it. The whole thing becomes less like a science experiment and more like a simple routine you can do every few weeks once you get the hang of the basic pattern.
Getting Your Tools Together: A Small Ritual Kit
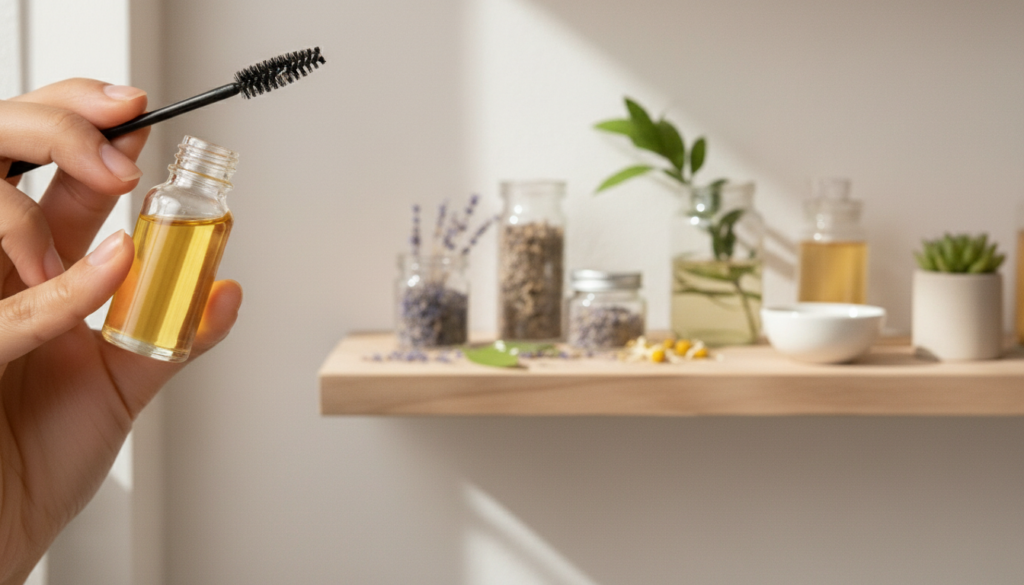
You should set up your workspace before you start working on your brows. It’s like getting things ready before you cook. Clean a part of your counter and get rid of any hair ties or toothpaste spots that might be in the way. Put your tools in the order that you plan to use them. This easy step gives you a sense of calm that makes the whole thing feel surprisingly relaxing. The best ways to laminate things at home only need a few basic items. Some people like to use full brow lamination kits, while others use gentle things they already have around the house. These could be mild lash lift products or soft-setting hair formulas that say they are safe to use near the eyes. The main idea stays the same no matter which option you choose. Use as little product as possible, and always go with the gentlest option.
| Item Name | Why It’s Used | Best Practice Tips |
|---|---|---|
| Gentle Face Wash | Cleanses skin and gets rid of extra oil or makeup. | Choose a gentle, soap-free cleanser, especially if you have sensitive skin. |
| Brow Spoolie | Helps style and line up eyebrow hairs | An old mascara brush that has been washed can be used again as a good alternative. |
| Brow Lamination Formula | Makes it easy to reshape brow hairs by relaxing them. | Always do a patch test at least a day before you use it. |
| Solution for Fixing or Setting | Keeps brows in the right place | Use a light layer; too much product can make brows heavy. |
| Oil or serum that hydrates | Nourishes the skin and hair around the eyebrows | For best results, put castor oil or a light brow serum on your brows at night. |
When you stand in front of your mirror with these basic tools, it feels less like a big deal and more like brushing your teeth with a little more care. You don’t want to become a professional brow expert overnight. You’re just learning how your brows grow naturally and then carefully shaping them into a style that you like.
Step by step, a slow, planned change to your eyebrows
You should take your time the first time you try to laminate something at home. Take your time so that you can notice the water coming out of the tap, how your fingers feel a little cold against your skin, and the small scratching feeling as the spoolie brushes through your hair. This process is not just about getting good results; it’s also about taking a few minutes to relax.
Make sure the canvas is very clean. Brows collect everything, like sunscreen, moisturiser, tiny bits of makeup, and even oil from your fingers when you touch your face without thinking. Start by washing the area with a mild, unscented cleanser. Use warm water to rinse and a soft towel to gently dry. To make sure there is no residue left, use a cotton pad on the brows. When your brows are completely clean, each hair stands up on its own, like wet grass after a storm.
Draw a line on your natural brow direction. Take a close look at your eyebrows before you use any product. Use a clean spoolie brush to comb them up and see how each hair naturally moves. Some hairs will stand up, some will stay flat, and some will stick out to the sides. Look for little empty spaces and see if the tail section is thin or if your arch has any strange patterns. Knowing these natural traits will help you figure out what to do next.
Use a lamination solution to make the hairs softer. Use a micro brush or cotton swab to put a small amount of your lifting or lamination solution on your brows. Keep it on the hair and not on the skin. This step is like softening clay before shaping it. The solution makes the hair structure less tight, so it can be shaped and hold a new shape. Use your spoolie to brush the solution through your eyebrows. Gently brush the hair up and out in the direction you planned earlier. Don’t rush through this step. You will see that the brows start to stay where you put them. Wait the amount of time the product directions say to let the solution sit. This usually takes a few minutes. You should use less time if your eyebrows are thin or fine.

Make shapes with purpose, not perfection
After the solution has been on for the recommended amount of time, use a clean spoolie brush to shape your brows the way you want them. To make the front hairs look fluffy and full, brush them up. Then, brush the arch and tail parts at an angle toward your temple. Every stroke of the brush helps you choose how to frame your face. You don’t have to be perfect. Symmetry is nice, but keep in mind that your face is one of a kind and natural. One eyebrow might have a sharper arch than the other, which might be fuller at the front. Your eyebrows should look like they go together, but they don’t have to be the same colour. The most important thing is that the end result looks like a better version of your own brows instead of copying someone else’s.
Set the new shape with a fixer
After removing any extra lifting solution as instructed, put on a small amount of setting or neutralizing solution. This step gently locks in the new shape you have created. Use the spoolie to comb through your brows again and arrange the hairs into your preferred shape. Press stubborn hairs into position with the spoolie tip for a few seconds so they stay in their new direction. When the setting time finishes, wipe away any leftover product & step back from the mirror. The result is often surprising: your natural brows now look taller & fuller as if someone suddenly made your face more defined.
The Days After: Letting Your Brows Settle Into Themselves
Freshly laminated brows can feel like getting a new haircut. For the first day or two you might catch yourself in mirrors & think you look different. But give your face time to adjust. As your skin’s natural oils return and the hairs relax a bit the look becomes softer and more natural. This is when aftercare becomes important. Don’t soak your brows for the first 24 hours & skip steamy showers and saunas. Avoid putting heavy creams on the area. If your skin feels tight use a light moisturizer around the brow line but not directly on it. By day two or three when your brows have settled you will probably find your morning routine much simpler. Instead of drawing on missing parts or using brow gels that flake by noon you can often just brush through with a clean spoolie. The laminated shape keeps the hairs lifted & full looking with almost no effort. It feels like waking up with your hair already styled except this time the style is built into your own features.
Nourishing the Wild Brow: Oils, Serums, and Small Habits
To maintain that fuller and thicker appearance you need to treat your brows like a small garden rather than just another makeup feature. You have already done the reshaping work and now you need to keep everything nourished so the foundation remains solid. Each night after washing your face apply a small amount of nourishing oil to your brows using your fingertips. Castor oil works well but you can also find lightweight brow serums made for this purpose. Gently massage the oil into your brows following the natural direction of hair growth as if you were smoothing down grass that has been blown by wind. This simple massage conditions the hairs and increases blood flow to the follicles underneath. Another important habit is knowing when to stop. When you see how full your laminated brows look you might feel tempted to grab tweezers and clean up the area. But removing too many hairs is the fastest way to ruin your results. Instead of plucking every small stray hair you should establish a gentle boundary and only remove the obvious ones that fall outside that line. Leave the rest alone because they add to the thick & natural fullness that looks current and authentic.
Creating Your Own Brow Rhythm at Home
As you practice you will find your own rhythm. Some people like to laminate every six to eight weeks & sync it with other quiet self-care rituals like changing sheets or decluttering a drawer or deep conditioning their hair. Others use a softer version of lamination more frequently and rely on less intense formulas with more emphasis on daily nourishing oil and gentle brushing. Think of it less as a rule & more as a tide cycle. Your brows will have their own pattern of growth & rest. On some weeks they will look extra bold with minimal effort. On others you will notice new baby hairs filling in at the front or along the tail. Let these shifts guide you. When they start to feel a little unruly again and droop by midday or refuse to hold shape it may be time for another gentle lamination session. The beauty of doing this at home is that you are always in conversation with your own face. You learn which products your skin tolerates & how long is just enough processing time and where your natural arch wants to live. Instead of handing your brows over to a stranger a few times a year you become your own quiet expert and respond to what you see in the mirror instead of a trend on a screen.